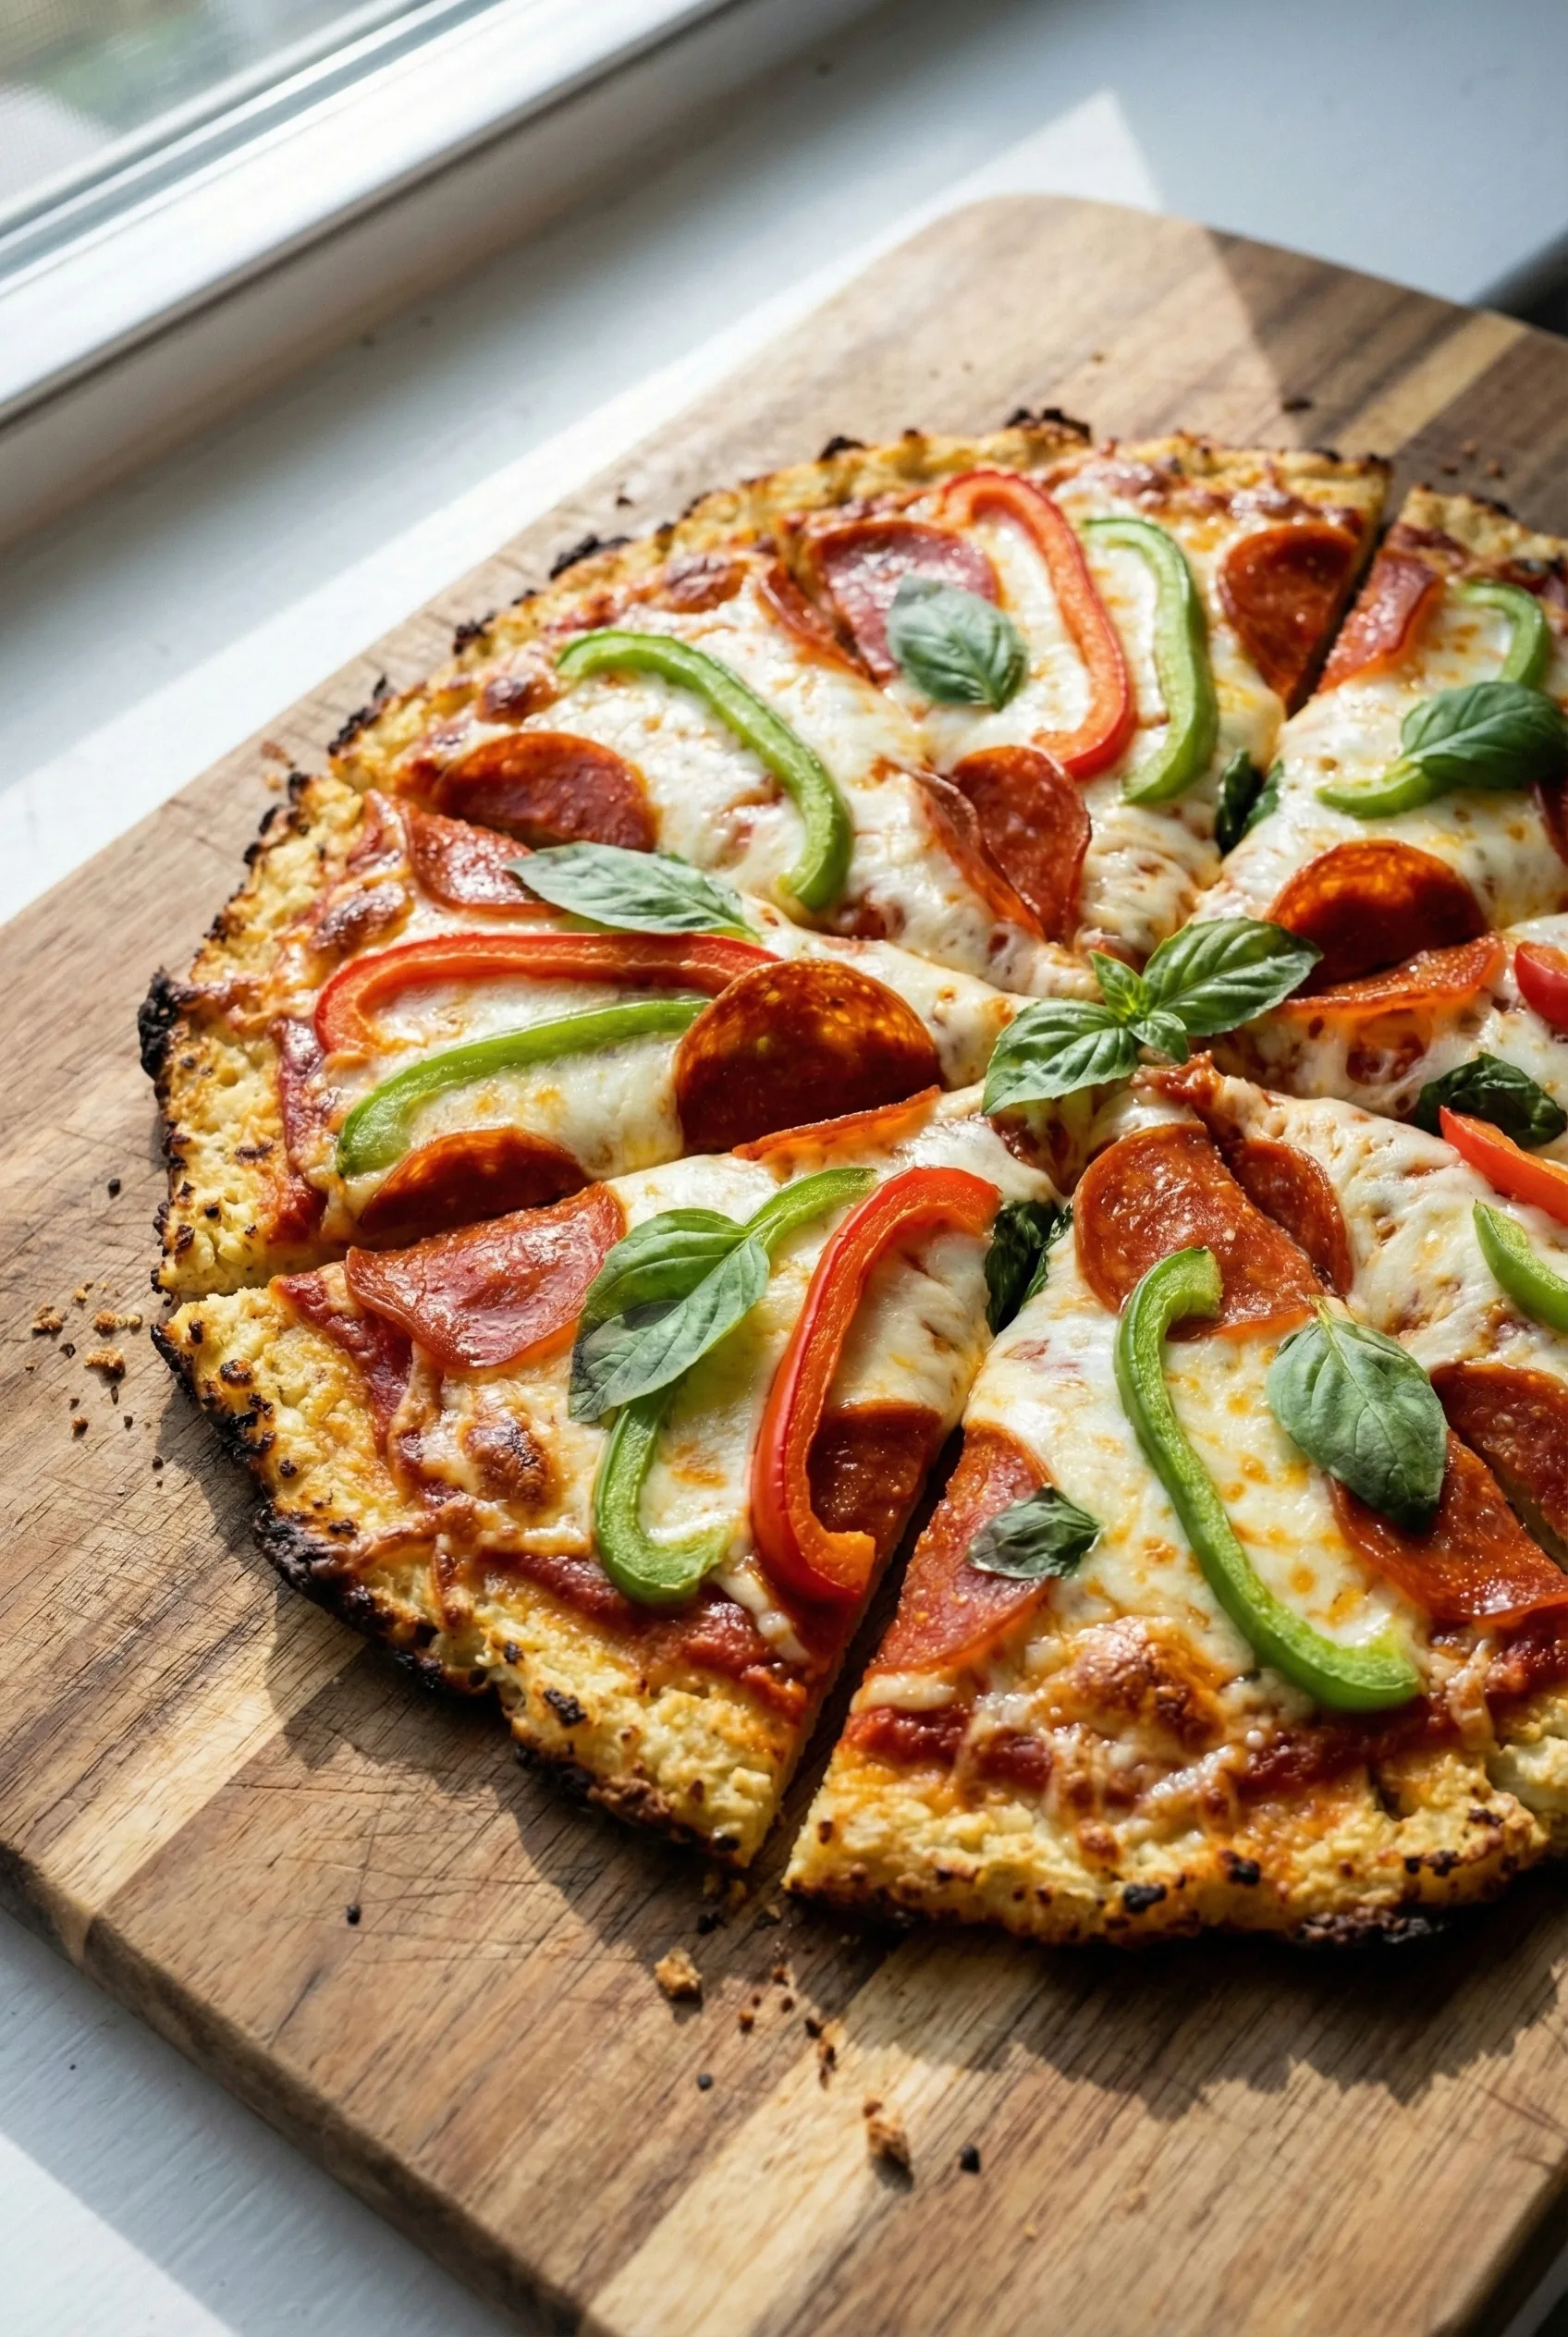
Let me tell you, I’ve made this Cauliflower Pizza Crust more times than I can count, and every single time it leaves my friends and family raving! If you’re like me and love pizza but want to keep things healthy, this recipe is an absolute game-changer. You won’t believe how a humble vegetable can transform into a delicious, crispy crust that’s not just low-carb but also packed with flavor. Trust me, once you try it, it will become your new go-to for pizza night!
Why You’ll Love This Cauliflower Pizza Crust
- Low-Carb Delight: Perfect for keto diets or anyone looking to cut back on carbs without sacrificing flavor.
- Gluten-Free Option: A fantastic choice for those with gluten sensitivities or celiac disease.
- Versatile Toppings: Dress it up with your favorite toppings, from classic pepperoni to fresh veggies.
- Quick and Easy: With just a few simple ingredients, you can whip this up in no time!
- Make-Ahead Friendly: You can prepare the crust in advance and freeze it for later use.
The Secret to Perfect Cauliflower Pizza Crust
The key to achieving that perfect Cauliflower Pizza Crust lies in the moisture content of the cauliflower. After cooking and ricing the cauliflower, you MUST squeeze out as much moisture as possible. I mean, really go for it! This will ensure your crust is crispy rather than soggy. Trust me, this step is crucial! I like to use a clean kitchen towel to wring it out, and it works like a charm. With this insider tip, you’ll be well on your way to pizza perfection!
Rave Reviews from Friends and Followers
“I was skeptical at first, but this cauliflower crust blew my mind! I couldn’t believe how crispy it was. My kids loved it too!” – Sarah T.
“This has become a staple in our house! It’s so easy to make and tastes amazing. I never want regular pizza again!” – Mike R.
“I made this for a dinner party, and everyone was asking for the recipe! It’s a total crowd-pleaser.” – Jenna L.
Creative Variations to Try
- Cheesy Garlic Crust: Add minced garlic and extra cheese to the crust mixture for a savory twist.
- Spicy Buffalo Cauliflower: Mix in some buffalo sauce for a spicy kick!
- Italian Herb Crust: Incorporate dried oregano and basil for a Mediterranean flair.
- Veggie-Loaded Crust: Fold in finely chopped spinach or other veggies for added nutrition.
Bonus: Use a mix of different cheeses for a richer flavor profile!
FAQs – All Your Questions Answered!
Can I make this crust ahead of time?
Absolutely! You can prepare the crust, allow it to cool, and then freeze it for up to a month. Just make sure to wrap it tightly!
What can I substitute for cheese?
If you need a dairy-free option, try using a plant-based cheese or nutritional yeast for flavor. Just keep in mind that the texture may vary slightly.
My crust turned out soggy. What went wrong?
This usually happens when the moisture isn’t squeezed out thoroughly. Make sure to wring out as much water as you can after cooking the cauliflower!
How long can I store the leftover crust?
You can keep leftover crust in the fridge for 3-4 days. Just reheat it in the oven for the best texture.
Storage/Serving Tips
- Store leftover crust in an airtight container in the fridge.
- For longer shelf life, freeze individual crusts layered with parchment paper.
- Serve warm with your favorite toppings, or use it as a base for mini pizzas!
Perfect Occasions for Cauliflower Pizza Crust
- Game Night with friends – impress everyone with a healthy twist on pizza!
- Family Movie Night – perfect for kids and adults alike!
- Meal Prep Sunday – make a batch for quick lunches during the week.
- Casual Get-Togethers – a hit at parties!
- Healthy Dinner Option – great for busy weeknights.
The Complete Recipe
Thank you for sticking with me! Now, let’s dive into making this delicious Cauliflower Pizza Crust. Get ready to impress!
Cauliflower Pizza Crust
Ingredients
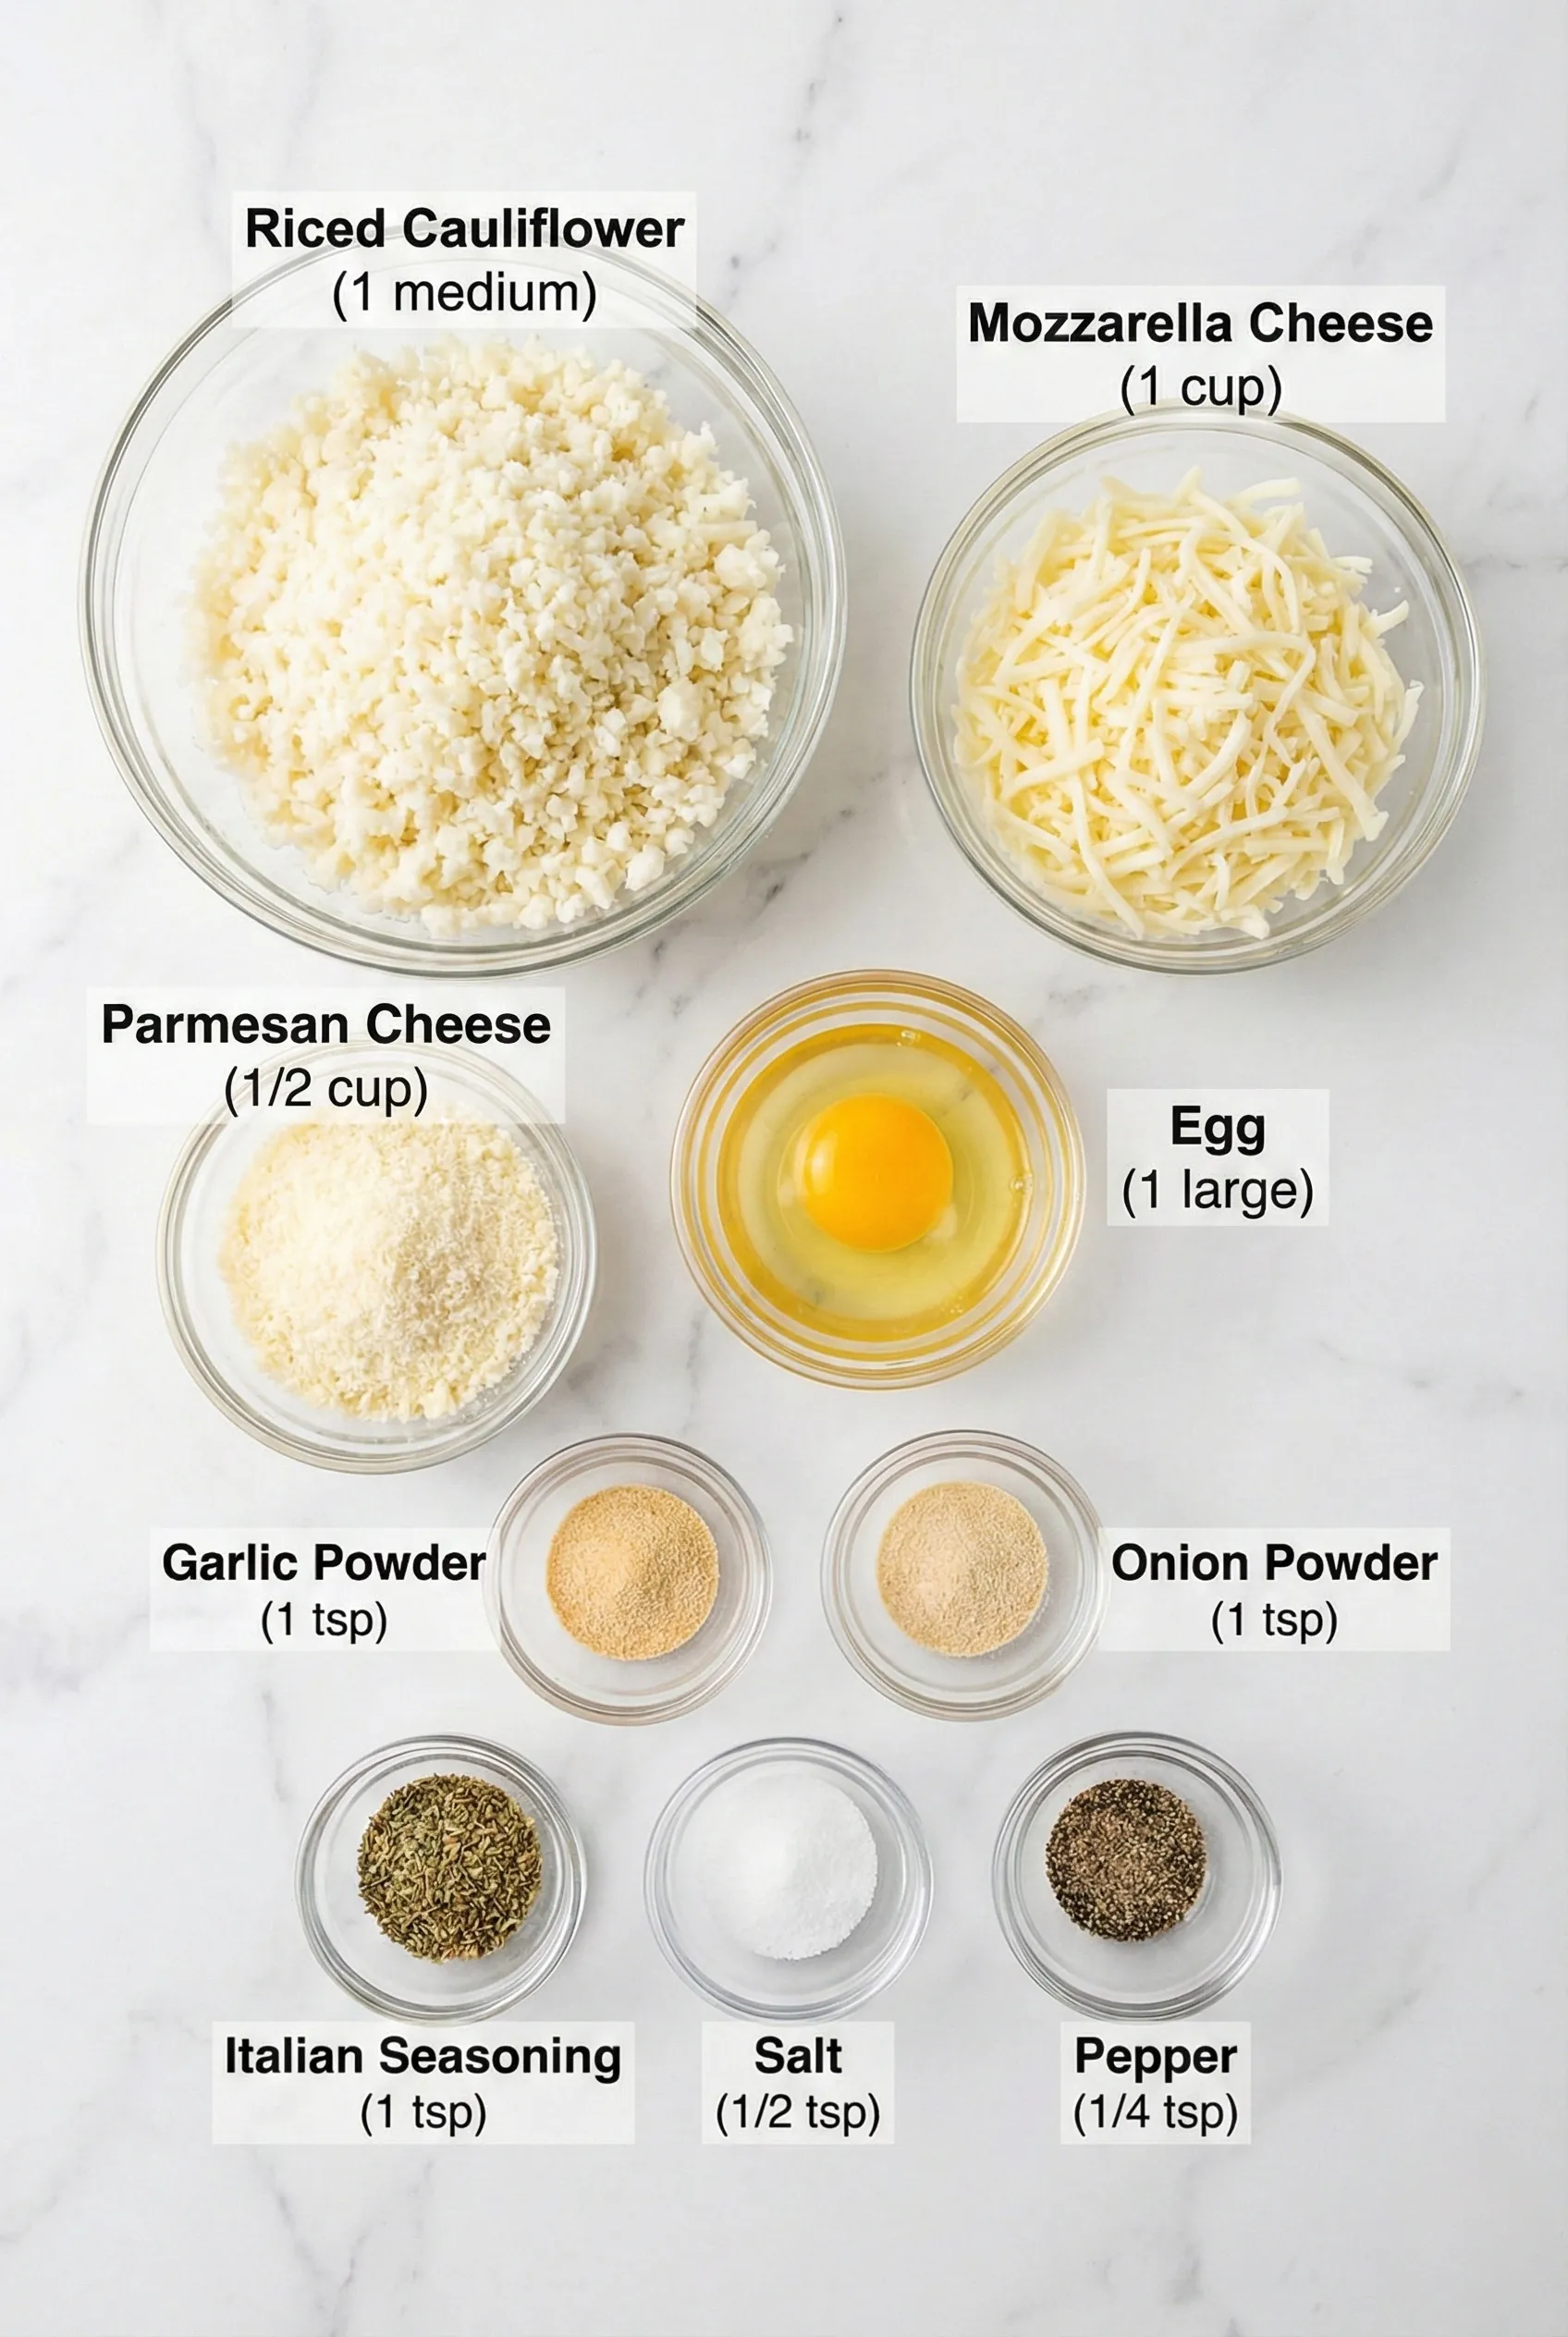
- 1 medium head of cauliflower (about 3-4 cups riced)
- 1 cup shredded mozzarella cheese
- 1/4 cup grated Parmesan cheese
- 1 large egg
- 1 teaspoon dried oregano
- 1 teaspoon garlic powder
- Salt and pepper to taste
Tip: Make sure to rice the cauliflower finely for the best texture! You can also use frozen riced cauliflower if you’re short on time.
Extend ingredients section: Feel free to add in spices or herbs like thyme or crushed red pepper flakes for an extra kick! Each ingredient plays a crucial role in the flavor and texture of your crust, so don’t skip on quality!
Step-by-Step Instructions
Step 1: Prepare the Cauliflower
Start by preheating your oven to 400°F (200°C). Remove the leaves and core from the cauliflower, then cut it into florets. Steam or microwave the florets until soft, about 5-7 minutes. You want them fork-tender! This is crucial for achieving that perfect texture.
Step 2: Rice the Cauliflower
Once it’s cooked, let the cauliflower cool slightly, then rice it using a food processor or box grater. Aim for a fine consistency similar to rice or couscous. This is where the magic begins, so take your time!
Step 3: Squeeze Out the Moisture
Here’s the most important part! Transfer the riced cauliflower to a clean kitchen towel and twist it to squeeze out as much moisture as possible. The drier, the better! This step will ensure your crust gets that delightful crispiness.
Step 4: Mix the Dough
In a large bowl, combine the riced cauliflower, mozzarella, Parmesan, egg, oregano, garlic powder, salt, and pepper. Mix well until fully combined. The egg acts as a binder and is essential for holding your crust together.
Step 5: Shape the Crust
Line a baking sheet with parchment paper and transfer the mixture onto it. Using your hands, shape the mixture into a round pizza crust about 1/4 inch thick. Make sure to create a slight lip around the edges to hold your toppings later. It’s all about that presentation!
Step 6: Bake the Crust
Bake the crust in your preheated oven for 25-30 minutes or until it’s golden brown and crispy. Keep an eye on it and rotate the pan halfway through for even cooking. The aroma will be incredible, and you’ll want to dive right in!
Step 7: Add Your Favorite Toppings
Once baked, remove the crust from the oven and add your preferred toppings. Return it to the oven for another 10-15 minutes to melt the cheese and heat everything through. Your kitchen will smell divine, and you’ll be so excited to dig in!
Step 8: Serve and Enjoy!
Let the crust cool for a few minutes before slicing. This will help it firm up a bit more. Serve warm, and enjoy the deliciousness of your homemade Cauliflower Pizza Crust!
Nutrition Info: Each
Cauliflower Pizza Crust
-
Total Time:
45 mins -
Yield:
4 servings
Enjoy a quick and easy recipe for delicious cauliflower pizza crust that’s low-carb and bursting with flavor. Perfect for a healthy pizza night!
Ingredients
- • 1 medium head of cauliflower (about 3-4 cups riced)
- • 1 cup shredded mozzarella cheese
- • 1/4 cup grated Parmesan cheese
- • 1 large egg
- • 1 teaspoon dried oregano
- • 1 teaspoon garlic powder
- • Salt and pepper to taste
Instructions
- Step 1: Prepare the Cauliflower – Preheat your oven to 400°F (200°C). Remove the leaves and core from the cauliflower, then cut it into florets. Steam or microwave the florets until soft, about 5-7 minutes.
- Step 2: Rice the Cauliflower – Let the cauliflower cool slightly, then rice it using a food processor or box grater.
- Step 3: Squeeze Out the Moisture – Transfer the riced cauliflower to a clean kitchen towel and twist it to squeeze out as much moisture as possible.
- Step 4: Mix the Dough – In a large bowl, combine the riced cauliflower, mozzarella, Parmesan, egg, oregano, garlic powder, salt, and pepper. Mix well until fully combined.
- Step 5: Shape the Crust – Line a baking sheet with parchment paper and transfer the mixture onto it. Shape the mixture into a round pizza crust about 1/4 inch thick.
- Step 6: Bake the Crust – Bake the crust in your preheated oven for 25-30 minutes or until it’s golden brown and crispy.
- Step 7: Add Your Favorite Toppings – Remove the crust from the oven and add your preferred toppings. Return it to the oven for another 10-15 minutes.
- Step 8: Serve and Enjoy! – Let the crust cool for a few minutes before slicing. Serve warm.
Notes
Storage: Store leftovers in an airtight container in the fridge for up to 3 days.
- Prep Time: 15 mins
- Cook Time: 30 mins
- Category: Main Course
- Cuisine: Italian
- Method: Oven